Tuesday, December 2, 2014

Can't locate Config/IniFiles.pm in @INC - SSLAudit

SSLAudit needs a few modules to be installed.

aditya@ubuntu:~$ perl SSLAudit.pl 
Can't locate Config/IniFiles.pm in @INC (you may need to install the Config::IniFiles module) (@INC contains: /etc/perl /usr/local/lib/perl/5.18.2 /usr/local/share/perl/5.18.2 /usr/lib/perl5 /usr/share/perl5 /usr/lib/perl/5.18 /usr/share/perl/5.18 /usr/local/lib/site_perl .) at SSLAudit.pl line 9.
BEGIN failed--compilation aborted at SSLAudit.pl line 9.

aditya@ubuntu:~$ sudo cpan install Config::IniFiles


=========

aditya@ubuntu:~$ perl SSLAudit.pl 
Can't locate Time/ParseDate.pm in @INC (you may need to install the Time::ParseDate module) (@INC contains: /etc/perl /usr/local/lib/perl/5.18.2 /usr/local/share/perl/5.18.2 /usr/lib/perl5 /usr/share/perl5 /usr/lib/perl/5.18 /usr/share/perl/5.18 /usr/local/lib/site_perl .) at SSLAudit.pl line 13.
BEGIN failed--compilation aborted at SSLAudit.pl line 13.


===========

aditya@ubuntu:~$ sudo cpan install Time::ParseDate


===========


Friday, November 28, 2014

CVE-2014-2309 - ICMPv6 Router Advertisement flood Denial of service

CVE reference: https://cve.mitre.org/cgi-bin/cvename.cgi?name=CVE-2014-2309

I guess it works only if your Linux box accepts IPV6 router advertisement packets. Do you want to check if your Linux accepts router advertisement packets?

Check the kernel settings for IPV6:

http://www.tldp.org/HOWTO/Linux+IPv6-HOWTO/proc-sys-net-ipv6..html

Check in /proc/sys/net/ipv6/conf//accept_ra setting, if 0 means disabled, if 1 means setting is enabled.

Tuesday, October 28, 2014

Mysql TLSv1 capture using Wireshark

I installed mysql and enabled SSL on it. And I was just wondering how to see if the encryption is really working. I dont know what SSL protocol mysql uses for encryption.

So I started wireshark and captured login using a remote machine.

The default capture will show you the protocol as mysql,


but inorder to see the SSL/TLS you need to decode the packets as SSL. The SSL handshake does not occur first, but is followed after a few mysql packet exchanges.


[Ubuntu 14.04] mysql with SSL: ERROR 2026 (HY000): SSL connection error: protocol version mismatch


I was trying to enable SSL on mysql in Ubuntu 14.04 and it was not easy.

1. Install simply, apt-get install mysql-client mysql-server and set a strong root password.
2. Generate openssl certs and enable SSL configurations in /etc/mysql/my.cnf like this:

#For the client: (localhost only)

[client]
port            = 3306
socket          = /var/run/mysqld/mysqld.sock
ssl=1
ssl-ca          = /etc/mysql/ca-cert.pem

[mysqld]
....
ssl=1
ssl-ca=/etc/mysql/ca-cert.pem
ssl-cert=/etc/mysql/server-cert.pem
ssl-key=/etc/mysql/server-key.pem
ssl-cipher=DHE-RSA-AES256-SHA

Restart mysql, thats it. But while trying to connect (mysql -u root -p), I faced an error:

ERROR 2026 (HY000): SSL connection error: protocol version mismatch

Later I figured out, it was due to Bad certificates (well kind of..),

So generate the certificates using the commands here:
http://askubuntu.com/questions/194074/enabling-ssl-in-mysql

Once you connect, you can /s to confirm that your cipher is on:

--------------------------------------------------------------------------------------------

mysql -u root -p
Enter password:
Welcome to the MySQL monitor.  Commands end with ; or \g.
Your MySQL connection id is 36
Server version: 5.5.38-0ubuntu0.14.04.1 (Ubuntu)

Copyright (c) 2000, 2014, Oracle and/or its affiliates. All rights reserved.

Oracle is a registered trademark of Oracle Corporation and/or its
affiliates. Other names may be trademarks of their respective
owners.

Type 'help;' or '\h' for help. Type '\c' to clear the current input statement.

mysql> \s
--------------
mysql  Ver 14.14 Distrib 5.5.38, for debian-linux-gnu (i686) using readline 6.3

Connection id: 36
Current database:
Current user: root@localhost
SSL: Cipher in use is DHE-RSA-AES256-SHA
Current pager: stdout
Using outfile: ''
Using delimiter: ;
Server version: 5.5.38-0ubuntu0.14.04.1 (Ubuntu)
Protocol version: 10
Connection: Localhost via UNIX socket
Server characterset: latin1
Db     characterset: latin1
Client characterset: utf8
Conn.  characterset: utf8
UNIX socket: /var/run/mysqld/mysqld.sock
Uptime: 11 days 1 hour 4 min 49 sec

Threads: 1  Questions: 109  Slow queries: 0  Opens: 171  Flush tables: 1  Open tables: 41  Queries per second avg: 0.000
--------------

mysql>

--------------------------------------------------------------------------------------------

Now if you want to see mysql SSL in action using wireshark,

http://rhosted.blogspot.in/2014/10/mysql-tlsv1-capture-using-wireshark.html

More references:
http://askubuntu.com/questions/194074/enabling-ssl-in-mysql

Saturday, October 18, 2014

Eclipse plugin list

1. Python development

pydev - Python development on eclipse.


http://pydev.org/


2. Shell script development

http://sourceforge.net/projects/shelled/

Yeah, I know what you have been thinking. IDE for shell scripts, vi or the Linux editors are the best thing to write a shell script. However, if you want to keep a project like structure for shell scripts for reference and to show or explain the shell script to anyone, this eclipse editor comes in handy. Not a replacement for vi though. Another limitation for windows users is that you do not have anything to run and test the shell script if you are on windows.


3. Linux tools for eclipse
http://www.eclipse.org/linuxtools/

This works pretty well with Shelled, when you are on windows but you want to refer to the man pages in Linux. That was the only use I could find in windows.

4. Remote Systems Explorer
Although using eclipse to access remote file systems through SSH/telnet/RDP sounds crazy but this is very handy while working with shell scripts using the shell script editor shelled. You can readily scp the files to your test machine and execute the scripts right from the eclipse console.


You can find it on the eclipse market place.

http://marketplace.eclipse.org/content/remote-system-explorer-ssh-telnet-ftp-and-dstore-protocols#.VBBalPmSysw

5. JADclipse
The Java decompiler -
http://sourceforge.net/projects/jadclipse/

6. Eclipse color themes
http://eclipsecolorthemes.org/?view=plugin

wombat:


7. Maven eclipse plugin, m2eclipse

https://www.eclipse.org/m2e/

8. StartExplorer: Starts an explorer or a command prompt at the location of the file in eclipse.

http://marketplace.eclipse.org/node/641101#.VBEnufmSyig


9. Browsing databases (Oracle, mysql and postgresql) using Toad Extension:

http://marketplace.eclipse.org/content/toad-extension-eclipse#.VBE68PmSyig


Monday, September 29, 2014

Shellshock: Patching GNU bash from source

Bash compilation notes, if you want to compile bash yourself. If you have an older version of bash and do not want to wait for your vendor, and you do not want to upgrade to the most latest version like 4.3. The patches for shellshock or CVE-2014-6271 are available for all the bash versions. However, early fixes have not been stable and the attack vectors are still evolving, so we still need to keep an eye on the developments.

Check what version you have by:
bash --version

Let's say I am running an old version of bash v 3.00

Before patching, I see that the trailing code after the function definition is getting executed:


[test@test ~]# env x='() { :;}; echo vulnerable' bash -c 'echo hello'
vulnerable
hello

Step 1: Download the bash source (base version) from:
http://ftp.gnu.org/gnu/bash/


wget http://ftp.gnu.org/gnu/bash/bash-3.0.tar.gz


Step 2: Get all the patches for bash 3.0 from the patches location and save them in a directory say patches:

mkdir patches

http://ftp.gnu.org/gnu/bash/bash-3.0-patches/

Save them as bash30-001.patch etc,  i.e. with a patch extension for easy handling.


[test@test patches]# ls
bash30-001.patch  bash30-005.patch  bash30-009.patch  bash30-013.patch  bash30-017.patch
bash30-002.patch  bash30-006.patch  bash30-010.patch  bash30-014.patch  bash30-018.patch
bash30-003.patch  bash30-007.patch  bash30-011.patch  bash30-015.patch  bash30-019.patch
bash30-004.patch  bash30-008.patch  bash30-012.patch  bash30-016.patch

Step 3: Extract bash and copy patches to the src dir:


[test@test bash_test]# tar -xvzf bash-3.0.tar.gz

Copy the patches to the extracted bash source directory:


[test@test bash-3.0]# cp ../patches/*.patch .

Step 4: Apply the patches:


[test@test bash-3.0]# for x in *.patch; do patch -p0 < $x; done


Step 5: Confirm that it got applied, second last line says 19:


[root@cap bash-3.0]# cat patchlevel.h
...
#define PATCHLEVEL 19

#endif /* _PATCHLEVEL_H_ */


Step 6: Compile bash:


./configure ; make ; make install

Step 7: After patching, test:


[test@test bash-3.0]# env x='() { :;}; echo vulnerable' bash -c 'echo hello'
hello
The statement echo vulnerable, did not execute.
I am not sure if this test is complete, as there are other ways to exploit it as well. I saw some of them here:
http://stevejenkins.com/blog/2014/09/how-to-manually-update-bash-to-patch-shellshock-bug-on-older-fedora-based-systems/

Nevertheless, there have been 3 bash patches so far, and I have applied all of them.


Extras: 

If you just want the compiled package and want to install it on different machines, then just use --prefix=destination_directory, like:


./configure --prefix=/home/test/compiled; make ; make install

This generates 4 directories (bin, info, man and share)

tarball it, so that you can distribute it to different machines:


cd /home/test/compiled

tar -cvzf bash_3.0.19_patched_binary.tar.gz bin/ info/ man/ share/

Before you extract the files in your root directory, make a backup of old bash binary in /bin/bash.

mv /bin/bash /bin/bash_old

Extraction:

tar -xvzf bash_3.0.19_patched_binary.tar.gz -C /


References:

http://apple.stackexchange.com/questions/146849/how-do-i-recompile-bash-to-avoid-shellshock-the-remote-exploit-cve-2014-6271-an

http://stevejenkins.com/blog/2014/09/how-to-manually-update-bash-to-patch-shellshock-bug-on-older-fedora-based-systems/


Friday, September 12, 2014

pyopenssl install using pip in windows 7 64-bit

pip and easy_install are not there by default in python 2.7.8 installation in windows. I am not a windows guy, but I live in a practical world, where I cannot avoid it.

You can jump to the bottom (Part 2) for the installation of pyopenssl through pip, after installing pip through easy_install. Below (Part 1) are just some silly errors that I faced on windows.

Part 1

Collection of errors/problems one faces while working on windows
I was trying to install pyopenssl using easy_install in windows 7, 64 bit

C:\Python27\Scripts>easy_install pyopenssl
.....
error: Setup script exited with error: Unable to find vcvarsall.bat


You need to install:

1. Visual Studio C++ 2008 Express Edition (this is 32 bit, a full installer that creates env variables as well)

http://download.microsoft.com/download/A/5/4/A54BADB6-9C3F-478D-8657-93B3FC9FE62D/vcsetup.exe

2. Microsoft Visual C++ 2008 Redistributable Package (x64) (same as step 1, but 64 bit..if u install this 64 bit installer alone, env vars like VS90COMNTOOLS do not get created. So I had to install both 32 and 64 bit versions) I would recommend to search for files like vcvars*.bat in Program Files, where these files get installed.

http://www.microsoft.com/en-in/download/details.aspx?id=15336

You need to install if you have an arch mismatch, like your python is 32 bit, but OS is 64 bit. Or you do not have 64 bit compiler installed. You will see an error like this:

raise ValueError(sValueError: [u'path']

See here for details: http://stackoverflow.com/questions/2817869/error-unable-to-find-vcvarsall-bat


3. Windows SDK for Windows 7 and .NET Framework 3.5 SP1 (this is for the compiler and for the header files, select only Windows Headers and Libraries and Visual C++ Compilers)

http://www.microsoft.com/en-us/download/details.aspx?id=3138

If you face, "Cannot open include file: 'basetsd.h': No such file or directory", then it means you did not select the header and libraries file options for microsoft SDK in step 3.

See here for details: http://stackoverflow.com/questions/23691564/running-cython-in-windows-x64-fatal-error-c1083-cannot-open-include-file-ba


If you do not want to get into all these compilation windows troubles,  I would recommend installing pyopenssl using pip:

Part 2:

Installing pyopenssl using pip, by installing pip through easy_install

1. easy_install through its setuptools installation script (https://pythonhosted.org/setuptools/easy_install.html#downloading-and-installing-a-package)
2. Use easy_install to install pip
3. Use pip to install pyopenssl (pip install pyopenssl)
4. Confirm by "import OpenSSL" in your IDLE python prompt. "OpenSSL" import is case-sensitive.
So "import openssl" will fail. :)  

Thursday, September 4, 2014

pcap.h: No such file or directory, /usr/bin/ld: cannot find -lpcap


thc-ipv6-lib.c:39:18: error: pcap.h: No such file or directory
In file included from thc-ipv6-lib.c:40:
..
/usr/bin/ld: cannot find -lpcap
collect2: ld returned 1 exit status
This is a very basic stuff, but helps me making a note of what I did. If the gcc compiler is unable to locate the source headers or the libraries, just find the location and compile it quickly. My old machine didnt have a pcap library installed, but I found an old nmap install which had its own pcap library. So just use -I and -L flags to specify the location of source files and library files respectively and get your job done. Nothing impressive about it. 

http://www.network-theory.co.uk/docs/gccintro/gccintro_21.html

[root@ani thc-ipv6-2.5]# make
gcc -O2 -D_HAVE_SSL -c -o thc-ipv6-lib.o thc-ipv6-lib.c
thc-ipv6-lib.c:39:18: error: pcap.h: No such file or directory
In file included from thc-ipv6-lib.c:40:
....
Ran a find for pcap.h (find / -name pcap.h) which returned something like /tools/scanners/nmap-6.01/libpcap/pcap.h

[root@ani thc-ipv6-2.5]# gcc -O2 -D_HAVE_SSL -I/tools/scanners/nmap-6.01/libpcap -c -o thc-ipv6-lib.o thc-ipv6-lib.c
Then again another problemo,

[root@ani thc-ipv6-2.5]# make
gcc -O2 -D_HAVE_SSL -o parasite6 parasite6.c thc-ipv6-lib.o -I/tools/scanners/nmap-6.01/libpcap -lpcap -lssl -lcrypto
/usr/bin/ld: cannot find -lpcap
collect2: ld returned 1 exit status
make: *** [parasite6] Error 1
edit Makefile, include the pcap library and header source location:

LDFLAGS+=-I/tools/scanners/nmap-6.01/libpcap -L/tools/scanners/nmap-6.01/libpcap -lpcap $(if $(HAVE_SSL),-lssl -lcrypto,)
and then you go..

[root@ani thc-ipv6-2.5]# make
gcc -O2 -D_HAVE_SSL -o parasite6 parasite6.c thc-ipv6-lib.o -I/tools/scanners/nmap-6.01/libpcap -L/tools/scanners/nmap-6.01/libpcap -lpcap -lssl -lcrypto
gcc -O2 -D_HAVE_SSL -o dos-new-ip6 dos-new-ip6.c thc-ipv6-lib.o -I/tools/scanners/nmap-6.01/libpcap -L/tools/scanners/nmap-6.01/libpcap -lpcap -lssl -lcrypto
gcc -O2 -D_HAVE_SSL -o detect-new-ip6 detect-new-ip6.c thc-ipv6-lib.o -I/tools/scanners/nmap-6.01/libpcap -L/tools/scanners/nmap-6.01/libpcap -lpcap -lssl -lcrypto
gcc -O2 -D_HAVE_SSL -o fake_router6 fake_router6.c thc-ipv6-lib.o -I/tools/scanners/nmap-6.01/libpcap -L/tools/scanners/nmap-6.01/libpcap -lpcap -lssl -lcrypto
....
And for the remaining tools:
[root@ani thc-ipv6-2.5]# make
gcc -O2 -D_HAVE_SSL -o dnssecwalk dnssecwalk.c
In file included from dnssecwalk.c:24:
thc-ipv6.h:14:18: error: pcap.h: No such file or directory
In file included from dnssecwalk.c:24:
..
Just compile it with the correct arguments:

[root@ani thc-ipv6-2.5]# gcc -O2 -I/tools/scanners/nmap-6.01/libpcap -D_HAVE_SSL -o dnssecwalk dnssecwalk.c


Monday, September 1, 2014

21 Books to make you an extreme tech master

Learning is an important part of our life. A habit of reading a lot of books not only keeps updated with technology but also formalizes your knowledge as compared to random google searches and reading through articles. Every book may or may not help you in your day to day job but surely will make you a different person once you have read and mastered the concepts thoroughly. Also every book or author's style may or may not click with you immediately, therefore it is important to keep a lot of books in your arsenal.

This is a collection of few books I would like to recommend to anyone who wants to learn tech stuff. Sometimes if I have to guide beginners into reading a new book, this is what I recommend.

This is a very small list of books and I wanted to keep a motivational journal for my own reference and revisions.
Some of these books I had read more than 5 years back and I still remember their awesomeness. I will keep on updating this page as I get time. This is going to be very big.

Groovy

  • Programming Groovy
by Venkat Subramaniam

Groovy is a dynamic language. The syntax is very similar to Java and I decided to learn about it because I came across it for a small project.


Maven

  • Maven by Example 
  • Maven: The Complete Reference

  • Apache Maven 3 Cookbook

The above three books should be good enough to get a good grasp on maven.  For any problems and tricks stack overflow is the best place to search.


Web Applications and Security

  • XSS Attacks: Cross Site Scripting Exploits and Defense
by Seth Fogie, Jeremiah Grossman, Robert Hansen, Anton Rager, Petko D. Petkov

This is quite a powerful book if you want to master cross site scripting concepts and move beyond alert('xss').

  • SQL Injection Attacks and Defense
Quite a powerful book if you want to get into the complexities of SQL injection. Even though SQL injection is considered trivial these days, but actually it requires a lot of understanding of the involved databases, configuration involved and what works or not. Which could be enough to turn a beginner off.


  • Web Application Hackers Handbook
        http://www.amazon.com/The-Web-Application-Hackers-Handbook/dp/1118026470

  • High Performance Websites
You are missing a lot of details on how websites work and what are the essential parameters to be considered while evaluating the performance of web pages. A lot of case studies from Yahoo. Written by a guy who worked on enhancing the performance of Yahoo products. Must read.

      http://shop.oreilly.com/product/9780596529307.do

General Security

  • Hacking: The Art of Exploitation, 2nd Edition

One of the best books out there to get a general idea of what goes under the hood. The buffer overflow explanation is extremely good and it also deals with several protections and exploitation techniques. For some reason the book provides you enough clarity.

  • Hacking Exposed series
Hacking Exposed: Network Security Secrets and Solutions, Sixth Edition
by Stuart McClure , Joel Scambray , George Kurtz


Exploitation and Tools

  • Chained Exploits: Advanced Hacking Attacks from Start to Finish
Andrew Whitaker (Author), Keatron Evans (Author), Jack Voth (Author)
http://www.amazon.in/Chained-Exploits-Advanced-Hacking-Attacks/dp/032149881X

This book deals with security in a very practical and enjoyable way making it very easy to understand real life security challenges. And how do you put the security tools to their practical use.


  • Buffer Overflow Attacks: Detect, Exploit, Prevent
by Jason Deckard

Totally focused on Buffer overflow attacks and their exploitation. Expert mode turned on.


  • Writing Security Tools and Exploits
by James C. Foster, Vincent T. Liu

  • The Shellcoder's Handbook: Discovering and Exploiting Security Holes
by Chris Anley

If you are into assembly and shellcoding techniques. This book would be an extreme fun. Shellcode is the small piece of machine code that you try to get executed while exploiting a buffer overflow.


Matering Wireshark and Network analysis

  • Practical Packet Analysis, 2nd Edition
Using Wireshark to Solve Real-World Network Problems

  • Wireshark & Ethereal Network Protocol Analyzer Toolkit
(Jay Beale's Open Source Security)

Network packet analysis is a skill that a majority of professionals lack. These books would turn you into 'The One' who reads and understands whats going on the wire. Troubleshooting network related problems and mapping them with real life use cases.


Cryptography (programming)

  • Java Cryptography
By Jonathan Knudsen

It is a little old book. But very well written. Most of the concepts have not changed as far as JCE and JCA is concerned. There are not many well written books that cover Java cryptography. Have you ever wondered what exactly a Secure Random is? What is its significance. How to use the Java JCE to encrypt stuff, how to use different encryption algorithms and key sizes effectively to encrypt and decrypt data.


Linux related

  • Bash Cookbook
Solutions and Examples for bash UsersBy Carl Albing, JP Vossen, Cameron Newham

This book turns you in a master of bash shell. Minute differences that always puzzle even the experts and by learning them you can show off.


  • SSH, The Secure Shell: The Definitive Guide
By Daniel J. Barrett, Richard E. Silverman

Everything you wanted to know about the SSH protocol.


  • Build your own Linux
Linux from Scratch project

By far the best Linux oriented and free book. Learn how to create your Linux. Compile all the packages, assemble your own tools, compile your own kernel. You learn what all basic stuff is required to build a Linux system. If you know what you are looking for, you can build an extremely sophisticated Linux that deals with a specialized job and very small too.

  • The Linux Kernel Module Programming Guide
        Peter Jay Salzman
        Michael Burian
        Ori Pomerantz

This is a free book. Its old, but it is very good for understanding the basics of Kernel modules and how they work. You ca also write and compile your own hello world kernel module. It covers lots of basics, so if you want to grab an idea about the low level working of the internals, then you should give it a quick read. I am reading it, because while investigating Linux kernel related vulnerabilities, sometimes you need to understand how the whole kernel module/driver procedure simply works. A lot of times vulnerabilities are reported in the kernel, however it does not necessarily mean that your Linux is vulnerable. There are lots of ifs, oohs and aahs involved. And only a hawk eyed kernel expert can tell you the difference. 

Sunday, August 31, 2014

JSSE based SSL ciphersuite tester


Just performs a handshake with the list of JSSE ciphers with the SSL server. If handshake is successful it marks it as a success. This is more of a test for Java based SSL clients which use JSSE for SSL/TLS communication. This code relies heavily on the underlying implementation provided by Java JDK/JSSE. Use it with 1.7 as a lot of cipher support has been added. As I mentioned, this is not a true SSL cipher scanner, because it depends on what ciphersuites have been enabled by JSSE. The server might support other ciphers that are not yet implemented by JSSE, but they wont turn up in the results. Actually if you can read from the raw SSL handshake packets, you can understand what the server SSL supports, you do not need java implementation for that.

package com.ssl.test;

import java.util.ArrayList;
import java.util.Collections;

import javax.net.ssl.SSLSocket;
import javax.net.ssl.SSLSocketFactory;

public class SSLTesting {

 private static final int PORT_TARGET = 443;
 private static final String HOST = "www.example.com";
 private static final String PROTO_SSLV3 = "SSLv3";
 private static final String PROTO_TLSV1 = "TLSv1";
 private static final String PROTO_TLSV11 = "TLSv1.1";
 private static final String PROTO_TLSV12 = "TLSv1.2";
 private static final boolean VERBOSE = false;
 
 // Note 1: Standard names for all the cipher suites, not all are yet implemented
 // http://docs.oracle.com/javase/7/docs/technotes/guides/security/StandardNames.html#ciphersuites

 // Note 2: All the ones supported by Java 7
 // http://docs.oracle.com/javase/7/docs/technotes/guides/security/SunProviders.html#SunJSSEProvider
 
 //See Note 2.
 private static final String jsseCiphersDisabledByDefault = "TLS_DH_anon_WITH_AES_256_CBC_SHA256:TLS_ECDH_anon_WITH_AES_256_CBC_SHA:TLS_DH_anon_WITH_AES_256_CBC_SHA:"
   + "TLS_DH_anon_WITH_AES_128_CBC_SHA256:TLS_ECDH_anon_WITH_AES_128_CBC_SHA:TLS_DH_anon_WITH_AES_128_CBC_SHA:TLS_ECDH_anon_WITH_RC4_128_SHA:"
   + "SSL_DH_anon_WITH_RC4_128_MD5:TLS_ECDH_anon_WITH_3DES_EDE_CBC_SHA:SSL_DH_anon_WITH_3DES_EDE_CBC_SHA:TLS_RSA_WITH_NULL_SHA256:"
   + "TLS_ECDHE_ECDSA_WITH_NULL_SHA:TLS_ECDHE_RSA_WITH_NULL_SHA:SSL_RSA_WITH_NULL_SHA:TLS_ECDH_ECDSA_WITH_NULL_SHA:TLS_ECDH_RSA_WITH_NULL_SHA:"
   + "TLS_ECDH_anon_WITH_NULL_SHA:SSL_RSA_WITH_NULL_MD5:SSL_RSA_WITH_DES_CBC_SHA:SSL_DHE_RSA_WITH_DES_CBC_SHA:SSL_DHE_DSS_WITH_DES_CBC_SHA:"
   + "SSL_DH_anon_WITH_DES_CBC_SHA:SSL_RSA_EXPORT_WITH_RC4_40_MD5:SSL_DH_anon_EXPORT_WITH_RC4_40_MD5:SSL_RSA_EXPORT_WITH_DES40_CBC_SHA:"
   + "SSL_DHE_RSA_EXPORT_WITH_DES40_CBC_SHA:SSL_DHE_DSS_EXPORT_WITH_DES40_CBC_SHA:SSL_DH_anon_EXPORT_WITH_DES40_CBC_SHA:TLS_KRB5_WITH_RC4_128_SHA:"
   + "TLS_KRB5_WITH_RC4_128_MD5:TLS_KRB5_WITH_3DES_EDE_CBC_SHA:TLS_KRB5_WITH_3DES_EDE_CBC_MD5:TLS_KRB5_WITH_DES_CBC_SHA:TLS_KRB5_WITH_DES_CBC_MD5:"
   + "TLS_KRB5_EXPORT_WITH_RC4_40_SHA:TLS_KRB5_EXPORT_WITH_RC4_40_MD5:TLS_KRB5_EXPORT_WITH_DES_CBC_40_SHA:TLS_KRB5_EXPORT_WITH_DES_CBC_40_MD5";
    //See Note 2.
 private static final String jsseCiphersEnabledByDefault = "TLS_ECDHE_ECDSA_WITH_AES_256_CBC_SHA384:TLS_ECDHE_RSA_WITH_AES_256_CBC_SHA384:TLS_RSA_WITH_AES_256_CBC_SHA256:"
   + "TLS_ECDH_ECDSA_WITH_AES_256_CBC_SHA384:TLS_ECDH_RSA_WITH_AES_256_CBC_SHA384:TLS_DHE_RSA_WITH_AES_256_CBC_SHA256:"
   + "TLS_DHE_DSS_WITH_AES_256_CBC_SHA256:TLS_ECDHE_ECDSA_WITH_AES_256_CBC_SHA:TLS_ECDHE_RSA_WITH_AES_256_CBC_SHA:TLS_RSA_WITH_AES_256_CBC_SHA:"
   + "TLS_ECDH_ECDSA_WITH_AES_256_CBC_SHA:TLS_ECDH_RSA_WITH_AES_256_CBC_SHA:TLS_DHE_RSA_WITH_AES_256_CBC_SHA:TLS_DHE_DSS_WITH_AES_256_CBC_SHA:"
   + "TLS_ECDHE_ECDSA_WITH_AES_128_CBC_SHA256:TLS_ECDHE_RSA_WITH_AES_128_CBC_SHA256:TLS_RSA_WITH_AES_128_CBC_SHA256:TLS_ECDH_ECDSA_WITH_AES_128_CBC_SHA256:"
   + "TLS_ECDH_RSA_WITH_AES_128_CBC_SHA256:TLS_DHE_RSA_WITH_AES_128_CBC_SHA256:TLS_DHE_DSS_WITH_AES_128_CBC_SHA256:TLS_ECDHE_ECDSA_WITH_AES_128_CBC_SHA:"
   + "TLS_ECDHE_RSA_WITH_AES_128_CBC_SHA:TLS_RSA_WITH_AES_128_CBC_SHA:TLS_ECDH_ECDSA_WITH_AES_128_CBC_SHA:TLS_ECDH_RSA_WITH_AES_128_CBC_SHA:"
   + "TLS_DHE_RSA_WITH_AES_128_CBC_SHA:TLS_DHE_DSS_WITH_AES_128_CBC_SHA:TLS_ECDHE_ECDSA_WITH_RC4_128_SHA:TLS_ECDHE_RSA_WITH_RC4_128_SHA:"
   + "SSL_RSA_WITH_RC4_128_SHA:TLS_ECDH_ECDSA_WITH_RC4_128_SHA:TLS_ECDH_RSA_WITH_RC4_128_SHA:TLS_ECDHE_ECDSA_WITH_3DES_EDE_CBC_SHA:"
   + "TLS_ECDHE_RSA_WITH_3DES_EDE_CBC_SHA:SSL_RSA_WITH_3DES_EDE_CBC_SHA:TLS_ECDH_ECDSA_WITH_3DES_EDE_CBC_SHA:TLS_ECDH_RSA_WITH_3DES_EDE_CBC_SHA:"
   + "SSL_DHE_RSA_WITH_3DES_EDE_CBC_SHA:SSL_DHE_DSS_WITH_3DES_EDE_CBC_SHA:SSL_RSA_WITH_RC4_128_MD5:TLS_EMPTY_RENEGOTIATION_INFO_SCSV";
 
 //A lot of them are not yet supported on jsse, See Note 1.
 private static final String jsseCompleteCipherList = "SSL_DH_anon_EXPORT_WITH_DES40_CBC_SHA:SSL_DH_anon_EXPORT_WITH_RC4_40_MD5:SSL_DH_anon_WITH_3DES_EDE_CBC_SHA:"
   + "TLS_DH_anon_WITH_AES_128_CBC_SHA:TLS_DH_anon_WITH_AES_128_CBC_SHA256:TLS_DH_anon_WITH_AES_128_GCM_SHA256:TLS_DH_anon_WITH_AES_256_CBC_SHA:"
   + "TLS_DH_anon_WITH_AES_256_CBC_SHA256:TLS_DH_anon_WITH_AES_256_GCM_SHA384:TLS_DH_anon_WITH_CAMELLIA_128_CBC_SHA:TLS_DH_anon_WITH_CAMELLIA_128_CBC_SHA256:"
   + "TLS_DH_anon_WITH_CAMELLIA_256_CBC_SHA:TLS_DH_anon_WITH_CAMELLIA_256_CBC_SHA256:SSL_DH_anon_WITH_DES_CBC_SHA:SSL_DH_anon_WITH_RC4_128_MD5:"
   + "TLS_DH_anon_WITH_SEED_CBC_SHA:SSL_DH_DSS_EXPORT_WITH_DES40_CBC_SHA:SSL_DH_DSS_WITH_3DES_EDE_CBC_SHA:TLS_DH_DSS_WITH_AES_128_CBC_SHA:"
   + "TLS_DH_DSS_WITH_AES_128_CBC_SHA256:TLS_DH_DSS_WITH_AES_128_GCM_SHA256:TLS_DH_DSS_WITH_AES_256_CBC_SHA:TLS_DH_DSS_WITH_AES_256_CBC_SHA256:"
   + "TLS_DH_DSS_WITH_AES_256_GCM_SHA384:TLS_DH_DSS_WITH_CAMELLIA_128_CBC_SHA:TLS_DH_DSS_WITH_CAMELLIA_128_CBC_SHA256:TLS_DH_DSS_WITH_CAMELLIA_256_CBC_SHA:"
   + "TLS_DH_DSS_WITH_CAMELLIA_256_CBC_SHA256:SSL_DH_DSS_WITH_DES_CBC_SHA:TLS_DH_DSS_WITH_SEED_CBC_SHA:SSL_DH_RSA_EXPORT_WITH_DES40_CBC_SHA:"
   + "SSL_DH_RSA_WITH_3DES_EDE_CBC_SHA:TLS_DH_RSA_WITH_AES_128_CBC_SHA:TLS_DH_RSA_WITH_AES_128_CBC_SHA256:TLS_DH_RSA_WITH_AES_128_GCM_SHA256:"
   + "TLS_DH_RSA_WITH_AES_256_CBC_SHA:TLS_DH_RSA_WITH_AES_256_CBC_SHA256:TLS_DH_RSA_WITH_AES_256_GCM_SHA384:TLS_DH_RSA_WITH_CAMELLIA_128_CBC_SHA:"
   + "TLS_DH_RSA_WITH_CAMELLIA_128_CBC_SHA256:TLS_DH_RSA_WITH_CAMELLIA_256_CBC_SHA:TLS_DH_RSA_WITH_CAMELLIA_256_CBC_SHA256:SSL_DH_RSA_WITH_DES_CBC_SHA:"
   + "TLS_DH_RSA_WITH_SEED_CBC_SHA:SSL_DHE_DSS_EXPORT_WITH_DES40_CBC_SHA:SSL_DHE_DSS_EXPORT1024_WITH_DES_CBC_SHA:SSL_DHE_DSS_EXPORT1024_WITH_RC4_56_SHA:"
   + "SSL_DHE_DSS_WITH_3DES_EDE_CBC_SHA:TLS_DHE_DSS_WITH_AES_128_CBC_SHA:TLS_DHE_DSS_WITH_AES_128_CBC_SHA256:TLS_DHE_DSS_WITH_AES_128_GCM_SHA256:"
   + "TLS_DHE_DSS_WITH_AES_256_CBC_SHA:TLS_DHE_DSS_WITH_AES_256_CBC_SHA256:TLS_DHE_DSS_WITH_AES_256_GCM_SHA384:TLS_DHE_DSS_WITH_CAMELLIA_128_CBC_SHA:"
   + "TLS_DHE_DSS_WITH_CAMELLIA_128_CBC_SHA256:TLS_DHE_DSS_WITH_CAMELLIA_256_CBC_SHA:TLS_DHE_DSS_WITH_CAMELLIA_256_CBC_SHA256:SSL_DHE_DSS_WITH_DES_CBC_SHA:"
   + "SSL_DHE_DSS_WITH_RC4_128_SHA:TLS_DHE_DSS_WITH_SEED_CBC_SHA:TLS_DHE_PSK_WITH_3DES_EDE_CBC_SHA:TLS_DHE_PSK_WITH_AES_128_CBC_SHA:"
   + "TLS_DHE_PSK_WITH_AES_128_CBC_SHA256:TLS_DHE_PSK_WITH_AES_128_GCM_SHA256:TLS_DHE_PSK_WITH_AES_256_CBC_SHA:TLS_DHE_PSK_WITH_AES_256_CBC_SHA384:"
   + "TLS_DHE_PSK_WITH_AES_256_GCM_SHA384:TLS_DHE_PSK_WITH_NULL_SHA:TLS_DHE_PSK_WITH_NULL_SHA256:TLS_DHE_PSK_WITH_NULL_SHA384:"
   + "TLS_DHE_PSK_WITH_RC4_128_SHA:SSL_DHE_RSA_EXPORT_WITH_DES40_CBC_SHA:SSL_DHE_RSA_WITH_3DES_EDE_CBC_SHA:TLS_DHE_RSA_WITH_AES_128_CBC_SHA:"
   + "TLS_DHE_RSA_WITH_AES_128_CBC_SHA256:TLS_DHE_RSA_WITH_AES_128_GCM_SHA256:TLS_DHE_RSA_WITH_AES_256_CBC_SHA:TLS_DHE_RSA_WITH_AES_256_CBC_SHA256:"
   + "TLS_DHE_RSA_WITH_AES_256_GCM_SHA384:TLS_DHE_RSA_WITH_CAMELLIA_128_CBC_SHA:TLS_DHE_RSA_WITH_CAMELLIA_128_CBC_SHA256:TLS_DHE_RSA_WITH_CAMELLIA_256_CBC_SHA:"
   + "TLS_DHE_RSA_WITH_CAMELLIA_256_CBC_SHA256:SSL_DHE_RSA_WITH_DES_CBC_SHA:TLS_DHE_RSA_WITH_SEED_CBC_SHA:TLS_ECDH_anon_WITH_3DES_EDE_CBC_SHA:"
   + "TLS_ECDH_anon_WITH_AES_128_CBC_SHA:TLS_ECDH_anon_WITH_AES_256_CBC_SHA:TLS_ECDH_anon_WITH_NULL_SHA:TLS_ECDH_anon_WITH_RC4_128_SHA:"
   + "TLS_ECDH_ECDSA_WITH_3DES_EDE_CBC_SHA:TLS_ECDH_ECDSA_WITH_AES_128_CBC_SHA:TLS_ECDH_ECDSA_WITH_AES_128_CBC_SHA256:TLS_ECDH_ECDSA_WITH_AES_128_GCM_SHA256:"
   + "TLS_ECDH_ECDSA_WITH_AES_256_CBC_SHA:TLS_ECDH_ECDSA_WITH_AES_256_CBC_SHA384:TLS_ECDH_ECDSA_WITH_AES_256_GCM_SHA384:TLS_ECDH_ECDSA_WITH_NULL_SHA:"
   + "TLS_ECDH_ECDSA_WITH_RC4_128_SHA:TLS_ECDH_RSA_WITH_3DES_EDE_CBC_SHA:TLS_ECDH_RSA_WITH_AES_128_CBC_SHA:TLS_ECDH_RSA_WITH_AES_128_CBC_SHA256:"
   + "TLS_ECDH_RSA_WITH_AES_128_GCM_SHA256:TLS_ECDH_RSA_WITH_AES_256_CBC_SHA:TLS_ECDH_RSA_WITH_AES_256_CBC_SHA384:TLS_ECDH_RSA_WITH_AES_256_GCM_SHA384:"
   + "TLS_ECDH_RSA_WITH_NULL_SHA:TLS_ECDH_RSA_WITH_RC4_128_SHA:TLS_ECDHE_ECDSA_WITH_3DES_EDE_CBC_SHA:TLS_ECDHE_ECDSA_WITH_AES_128_CBC_SHA:"
   + "TLS_ECDHE_ECDSA_WITH_AES_128_CBC_SHA256:TLS_ECDHE_ECDSA_WITH_AES_128_GCM_SHA256:TLS_ECDHE_ECDSA_WITH_AES_256_CBC_SHA:"
   + "TLS_ECDHE_ECDSA_WITH_AES_256_CBC_SHA384:TLS_ECDHE_ECDSA_WITH_AES_256_GCM_SHA384:TLS_ECDHE_ECDSA_WITH_NULL_SHA:TLS_ECDHE_ECDSA_WITH_RC4_128_SHA:"
   + "TLS_ECDHE_PSK_WITH_3DES_EDE_CBC_SHA:TLS_ECDHE_PSK_WITH_AES_128_CBC_SHA:TLS_ECDHE_PSK_WITH_AES_128_CBC_SHA256:TLS_ECDHE_PSK_WITH_AES_256_CBC_SHA:"
   + "TLS_ECDHE_PSK_WITH_AES_256_CBC_SHA384:TLS_ECDHE_PSK_WITH_NULL_SHA:TLS_ECDHE_PSK_WITH_NULL_SHA256:TLS_ECDHE_PSK_WITH_NULL_SHA384:"
   + "TLS_ECDHE_PSK_WITH_RC4_128_SHA:TLS_ECDHE_RSA_WITH_3DES_EDE_CBC_SHA:TLS_ECDHE_RSA_WITH_AES_128_CBC_SHA:TLS_ECDHE_RSA_WITH_AES_128_CBC_SHA256:"
   + "TLS_ECDHE_RSA_WITH_AES_128_GCM_SHA256:TLS_ECDHE_RSA_WITH_AES_256_CBC_SHA:TLS_ECDHE_RSA_WITH_AES_256_CBC_SHA384:TLS_ECDHE_RSA_WITH_AES_256_GCM_SHA384:"
   + "TLS_ECDHE_RSA_WITH_NULL_SHA:TLS_ECDHE_RSA_WITH_RC4_128_SHA:TLS_EMPTY_RENEGOTIATION_INFO_SCSV:SSL_FORTEZZA_DMS_WITH_FORTEZZA_CBC_SHA:"
   + "SSL_FORTEZZA_DMS_WITH_NULL_SHA:TLS_KRB5_EXPORT_WITH_DES_CBC_40_MD5:TLS_KRB5_EXPORT_WITH_DES_CBC_40_SHA:TLS_KRB5_EXPORT_WITH_RC2_CBC_40_MD5:"
   + "TLS_KRB5_EXPORT_WITH_RC2_CBC_40_SHA:TLS_KRB5_EXPORT_WITH_RC4_40_MD5:TLS_KRB5_EXPORT_WITH_RC4_40_SHA:TLS_KRB5_WITH_3DES_EDE_CBC_MD5:"
   + "TLS_KRB5_WITH_3DES_EDE_CBC_SHA:TLS_KRB5_WITH_DES_CBC_MD5:TLS_KRB5_WITH_DES_CBC_SHA:TLS_KRB5_WITH_IDEA_CBC_MD5:TLS_KRB5_WITH_IDEA_CBC_SHA:"
   + "TLS_KRB5_WITH_RC4_128_MD5:TLS_KRB5_WITH_RC4_128_SHA:TLS_PSK_WITH_3DES_EDE_CBC_SHA:TLS_PSK_WITH_AES_128_CBC_SHA:TLS_PSK_WITH_AES_128_CBC_SHA256:"
   + "TLS_PSK_WITH_AES_128_GCM_SHA256:TLS_PSK_WITH_AES_256_CBC_SHA:TLS_PSK_WITH_AES_256_CBC_SHA384:TLS_PSK_WITH_AES_256_GCM_SHA384:TLS_PSK_WITH_NULL_SHA:"
   + "TLS_PSK_WITH_NULL_SHA256:TLS_PSK_WITH_NULL_SHA384:TLS_PSK_WITH_RC4_128_SHA:SSL_RSA_EXPORT_WITH_DES40_CBC_SHA:SSL_RSA_EXPORT_WITH_RC2_CBC_40_MD5:"
   + "SSL_RSA_EXPORT_WITH_RC4_40_MD5:SSL_RSA_EXPORT1024_WITH_DES_CBC_SHA:SSL_RSA_EXPORT1024_WITH_RC4_56_SHA:SSL_RSA_FIPS_WITH_3DES_EDE_CBC_SHA:"
   + "SSL_RSA_FIPS_WITH_DES_CBC_SHA:TLS_RSA_PSK_WITH_3DES_EDE_CBC_SHA:TLS_RSA_PSK_WITH_AES_128_CBC_SHA:TLS_RSA_PSK_WITH_AES_128_CBC_SHA256:"
   + "TLS_RSA_PSK_WITH_AES_128_GCM_SHA256:TLS_RSA_PSK_WITH_AES_256_CBC_SHA:TLS_RSA_PSK_WITH_AES_256_CBC_SHA384:TLS_RSA_PSK_WITH_AES_256_GCM_SHA384:"
   + "TLS_RSA_PSK_WITH_NULL_SHA:TLS_RSA_PSK_WITH_NULL_SHA256:TLS_RSA_PSK_WITH_NULL_SHA384:TLS_RSA_PSK_WITH_RC4_128_SHA:SSL_RSA_WITH_3DES_EDE_CBC_SHA:"
   + "TLS_RSA_WITH_AES_128_CBC_SHA:TLS_RSA_WITH_AES_128_CBC_SHA256:TLS_RSA_WITH_AES_128_GCM_SHA256:TLS_RSA_WITH_AES_256_CBC_SHA:TLS_RSA_WITH_AES_256_CBC_SHA256:"
   + "TLS_RSA_WITH_AES_256_GCM_SHA384:TLS_RSA_WITH_CAMELLIA_128_CBC_SHA:TLS_RSA_WITH_CAMELLIA_128_CBC_SHA256:TLS_RSA_WITH_CAMELLIA_256_CBC_SHA:"
   + "TLS_RSA_WITH_CAMELLIA_256_CBC_SHA256:SSL_RSA_WITH_DES_CBC_SHA:SSL_RSA_WITH_IDEA_CBC_SHA:SSL_RSA_WITH_NULL_MD5:SSL_RSA_WITH_NULL_SHA:"
   + "TLS_RSA_WITH_NULL_SHA256:SSL_RSA_WITH_RC4_128_MD5:SSL_RSA_WITH_RC4_128_SHA:TLS_RSA_WITH_SEED_CBC_SHA:TLS_SRP_SHA_DSS_WITH_3DES_EDE_CBC_SHA:"
   + "TLS_SRP_SHA_DSS_WITH_AES_128_CBC_SHA:TLS_SRP_SHA_DSS_WITH_AES_256_CBC_SHA:TLS_SRP_SHA_RSA_WITH_3DES_EDE_CBC_SHA:TLS_SRP_SHA_RSA_WITH_AES_128_CBC_SHA:"
   + "TLS_SRP_SHA_RSA_WITH_AES_256_CBC_SHA:TLS_SRP_SHA_WITH_3DES_EDE_CBC_SHA:TLS_SRP_SHA_WITH_AES_128_CBC_SHA:TLS_SRP_SHA_WITH_AES_256_CBC_SHA";
 
 public static void main(String[] args) throws Exception {
  String ciphers = jsseCiphersEnabledByDefault + ":" + jsseCiphersDisabledByDefault;
  System.out.println("Using Hostname : port = " + HOST + " : " + PORT_TARGET);
   
  //test enabled and the ones that disabled by default
   testSSL(HOST, PORT_TARGET, PROTO_SSLV3, ciphers);
   testSSL(HOST, PORT_TARGET, PROTO_TLSV1, ciphers);
   testSSL(HOST, PORT_TARGET, PROTO_TLSV11, ciphers);
   testSSL(HOST, PORT_TARGET, PROTO_TLSV12, ciphers);
     
  //test weak ciphers
  /* testSSL(HOST, PORT_TARGET, PROTO_SSLV3, jsseCiphersDisabledByDefault);
   testSSL(HOST, PORT_TARGET, PROTO_TLSV1, jsseCiphersDisabledByDefault);
   testSSL(HOST, PORT_TARGET, PROTO_TLSV11, jsseCiphersDisabledByDefault);
   testSSL(HOST, PORT_TARGET, PROTO_TLSV12, jsseCiphersDisabledByDefault);*/
 
 
 }

 private static void testSSL(String hostname, int port, String version, String cipherSuitesToTest) {
  try {
   System.out.println("-------------------------");
   System.out.println("Protocol : " + version);
   ArrayList success = new ArrayList();
   ArrayList unsupported = new ArrayList();
   ArrayList fail = new ArrayList();
   SSLSocketFactory factory = (SSLSocketFactory) SSLSocketFactory
     .getDefault();
   SSLSocket socket = (SSLSocket) factory.createSocket(hostname, port);
   //set the SSL version to be used
   String[] prots = { version };
   socket.setEnabledProtocols(prots);

   String[] cipherSuitesClient = cipherSuitesToTest.split(":");

   for (String ciphers : cipherSuitesClient) {
    socket = (SSLSocket) factory.createSocket(hostname, port);
    socket.setEnabledProtocols(prots);
    String[] array = { ciphers };
    //try making a handshake
    try {
    socket.setEnabledCipherSuites(array);
     socket.startHandshake();
     success.add(ciphers);
    } catch (javax.net.ssl.SSLHandshakeException e) {
     fail.add(ciphers);
    } catch (java.lang.IllegalArgumentException e){
     if (e.getMessage().contains("Unsupported ciphersuite") || e.getMessage().contains("Cannot support"))
      unsupported.add(ciphers);
     else
      e.printStackTrace();
    }
    catch (Exception e) {
     System.out.println(ciphers + ":" + e.getClass() + " "
       + e.getMessage());
    }
    socket.close();
   }
   System.out.println("Testing " + version + " ciphers. Count: "
     + cipherSuitesClient.length);
   System.out.println("Successful Handshake count = "
     + success.size());
   Collections.sort(success);
   for (String name : success) {
    System.out.println("[" + version + "]" + " +" + name);
   }
   
   System.out.println("Unsupported list. Count = " + unsupported.size());
   Collections.sort(unsupported);
   if(VERBOSE){
   for (String name : unsupported) {
    System.out.println("[" + version + "]" + "XXX " + name);
   }
   }

   System.out.println("Handshake Failed Count = " + fail.size());
   if(VERBOSE){
   for (String name : fail) {
     System.out.println("[" + version + "]" + "-" + name);
   }
   }

  } catch (Exception e) {
   e.printStackTrace();
  }
 }
}

Saturday, August 30, 2014

Java/JSSE Handshake SSL/TLS exceptions

If you are facing some of the below errors, it might mean you are using a Java that does not have the support for the thing you are trying to do:

Example 1: Illegal argument exceptions for protocol version
You are enabling TLS 1.1 and TLS 1.2, but it may give you an exception if you are using Java 1.6. 1.6 does not support TLS 1.1 and TLS 1.2. You can check here as it supports only SSLv3 and TLSv1 (See Support classes and Interfaces section and see the possible values for SSLContext):


http://docs.oracle.com/javase/6/docs/technotes/guides/security/jsse/JSSERefGuide.html

...
String[] protocols = {"TLSv1.1", "TLSv1.2"};
socket = (SSLSocket) factory.createSocket(hostname, port);
    socket.setEnabledProtocols(protocols);
...

-------------------------
Protocol : TLSv1.1
java.lang.IllegalArgumentException: TLSv1.1
    at com.sun.net.ssl.internal.ssl.ProtocolVersion.valueOf(ProtocolVersion.java:133)
    at com.sun.net.ssl.internal.ssl.ProtocolList.(ProtocolList.java:38)
    at com.sun.net.ssl.internal.ssl.SSLSocketImpl.setEnabledProtocols(SSLSocketImpl.java:2202)
    at com.ssl.test.SSLTesting.testSSL(SSLTesting.java:177)
    at com.ssl.test.SSLTesting.main(SSLTesting.java:154)
-------------------------
Protocol : TLSv1.2
java.lang.IllegalArgumentException: TLSv1.2
    at com.sun.net.ssl.internal.ssl.ProtocolVersion.valueOf(ProtocolVersion.java:133)
    at com.sun.net.ssl.internal.ssl.ProtocolList.(ProtocolList.java:38)
    at com.sun.net.ssl.internal.ssl.SSLSocketImpl.setEnabledProtocols(SSLSocketImpl.java:2202)
    at com.ssl.test.SSLTesting.testSSL(SSLTesting.java:177)
    at com.ssl.test.SSLTesting.main(SSLTesting.java:164)


So, as an example, when I check, I see that my eclipse is still using 1.6 for execution.


So I need to change it to 1.7 to destroy these ugly exceptions. :D. You can check the page for JSSE 7.
http://docs.oracle.com/javase/7/docs/technotes/guides/security/jsse/JSSERefGuide.html and see the values for SSLContext. Changed to 1.7.


Example 2: Cannot support cipher exceptions:

Cannot support exceptions again point to the use of an incorrect JRE like 1.6. However, unsupported exception (that you can get while using 1.7) might mean that the ciphersuite is still not implemented in JSSE 1.7.
To get a list of a complete list of JSSE cipher names you can use this link:
http://docs.oracle.com/javase/7/docs/technotes/guides/security/StandardNames.html#ciphersuites

However, you must know that these are only the names that JSSE is going to use, some of the ciphers are still not implemented and can be expected to be implemented in Java 8. To see what all ciphers are implemendted in 1.7, you can use this link, check the Cipher suite section:
http://docs.oracle.com/javase/7/docs/technotes/guides/security/SunProviders.html#SunJSSEProvider

java.lang.IllegalArgumentException: Cannot support TLS_ECDHE_RSA_WITH_AES_128_CBC_SHA with currently installed providers
    at com.sun.net.ssl.internal.ssl.CipherSuiteList.(CipherSuiteList.java:79)
    at com.sun.net.ssl.internal.ssl.SSLSocketImpl.setEnabledCipherSuites(SSLSocketImpl.java:2162)
    at com.ssl.test.SSLTesting.testSSL(SSLTesting.java:186)

Friday, August 15, 2014

SSL/TLS cipher testing Notes and Tools

I am trying to gather some freely available tools, techniques and links that can help running SSL/TLS related tests. The more I learn, the more stuff I will add. SSL/TLS is not that simple, you cannot rely on the output of just 1 tool. You also need to understand how that tool/script works internally.

Tools and scripts (will keep adding)

Testing might be affected with what openssl version you have installed, because older versions may not have support for newer cipher suites or higher protocols. So while testing you need to take this into consideration.

1. Nmap ssl-enum-ciphers script

nmap --script ssl-enum-ciphers -p 443 hostname

http://nmap.org/nsedoc/scripts/ssl-enum-ciphers.html


2. sslscan. (based on openssl)
http://sourceforge.net/projects/sslscan/

Uses openssl internally. If you compile it on redhat, you may run into compilation issues because EC crypto is not there in openssl in redhat (depending on your version). If you are not interested in testing EC, then you can comment out the lines as mentioned in my previous post:

http://rhosted.blogspot.in/2014/02/using-sslscan-and-ssltests-for-testing.html


3. ssl_tests (based on sslscan/openssl)
ssl_tests is a shell script that uses sslscan and openssl internally to connect.

www.pentesterscripting.com/discovery/ssl_tests


4. Using OpenSSL directly
openssl s_client -connect host:port

5. sslyze
root@kali:~# sslyze --tlsv1 www.example.com

6. TestSSLServer : A simple java program that does the same kind of testing. The program uses plain sockets and raw packet level inspection and does not depend on any provider like JSSE or Openssl as such. So it is very good for learning at raw packet level as to how do you know whether compression is supported or not. The program also checks CRIME and BEAST status by checking the compression support in the connection and inspecting the protocol version. You can see how it does that in the comments.

However, I would recommend you develop your own understand about CRIME/BEAST working and its latest status depending on your own application implementation rather than relying on the output of the testing program. Things and assumptions keep changing with time.

http://www.bolet.org/TestSSLServer/

Original reference: http://security.stackexchange.com/questions/20376/tools-to-test-for-beast-crime-that-arent-internet-based

Here is a screenshot of running the tool using eclipse:


7. SSLDigger by Foundstone -
It is a windows based tool. However, it does not have support for a lot of latest ciphers probably because it has not been updated.


http://www.mcafee.com/uk/downloads/free-tools/ssldigger.aspx

8. If you want to play around writing your own tool, here is a small test I did in Java. This tool is an example of how you can use a crypto library for SSL testing. The drawback is that you can only test the cipher that your client library supports. In contrast to TestSSLServer (6) which does a packet level inspection and does not rely on a local crypto library.

http://rhosted.blogspot.in/2014/08/jsse-based-ssl-ciphersuite-tester.html


9. Testing the SSL for mysql and postgresql?
Databases do not really follow the procedures of a typical SSL/TLS handshake. You need to have a db client for that or you can use wireshark. Wanna see an example, check my earlier notes on mysql's ssl:

http://rhosted.blogspot.in/2014/10/mysql-tlsv1-capture-using-wireshark.html


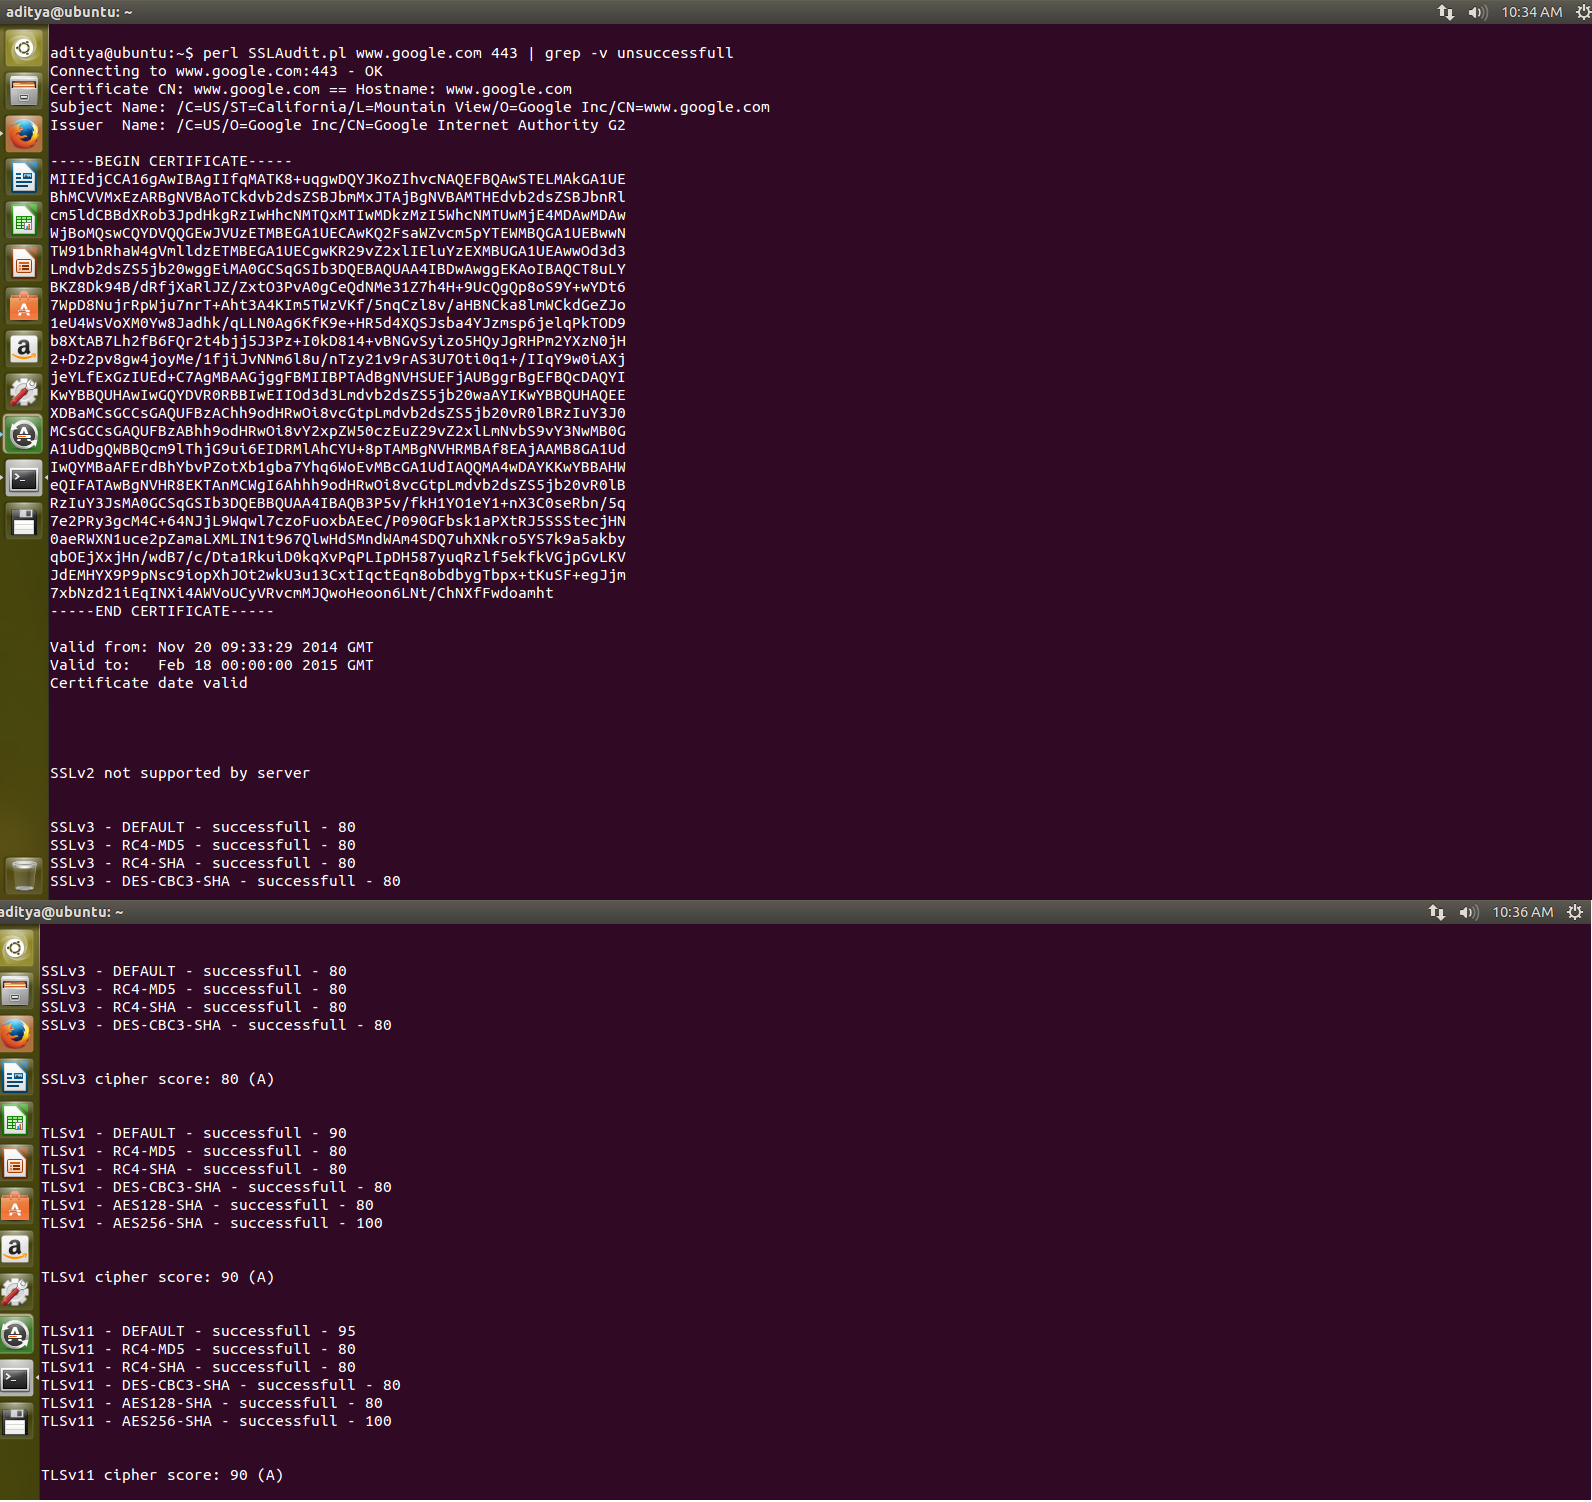
10. SSLAudit - https://code.google.com/p/sslaudit/

I found SSLAudit pretty good.


11. SSL Breacher
http://bl0g.yehg.net/2014/07/ssl-breacher-yet-another-ssl-test-tool.html

12. TLSSLed (Based on sslscan/openssl)
http://blog.taddong.com/2011/05/tlssled-v10.html


To be continued..

Helpful references for testing


TLS learning

[*]  Listing of Openssl ciphers (meaning of examples like ALL:!ADH:@STRENGTH)
       https://www.openssl.org/docs/apps/ciphers.html#EXAMPLES

[*]  A little advanced but good learning material about TLS
       https://www.owasp.org/index.php/Transport_Layer_Protection_Cheat_Sheet

[*]  Explains a lot of common SSL problems in a very simple way.
       https://www.howsmyssl.com/s/about.html

[*]  Understanding the meaning of a cipher string like DHE-RSA-AES256-SHA
       http://nzbget.net/Choosing_a_cipher

[*]  High/Low/Med grade ciphers
       https://bto.bluecoat.com/packetguide/appcelera-3.0.2/configure/ssl-cipher-details-popup.htm

SSL/TLS best practices

[*]  https://www.ssllabs.com/projects/best-practices/index.html

Products using SSL

[*] Postgres using SSL (How to test SSL being used)
      https://kb.berkeley.edu/page.php?id=23113

BEAST

http://blog.cryptographyengineering.com/2011/09/brief-diversion-beast-attack-on-tlsssl.html

Friday, June 13, 2014

How to Setup Chroot SFTP in Suse 11

Setup a chrooted SSH sftp account. (Tested on Suse 11 and OpenSSH) 
We will create a low privileged sftp directory where lets say the users can upload their stuff without exposing our internal filesystem. First, add a user with a home directory, we don't want this user to access ssh via a shell, only for sftp, that's why we are setting the shell to /bin/false. Chrooted shell is a different chapter, so not discussing it here. And you can confirm the settings of newly added bobuser in /etc/passwd.

test:~ # useradd -d /home/bobuser -s /bin/false -m bobuser
test:~ # cat /etc/passwd | grep bobuser
bobuser:x:1505:100::/home/bobuser:/bin/false

Set the password for bobuser, or else you it will not allow you to login if the password is not set.

passwd bobuser
Changing password for bobuser.
New password:
BAD PASSWORD: it is based on a dictionary word
Retype new password:
Password changed.

Add the following settings in /etc/ssh/sshd_config file.

#Sftp/chroot Settings for bobuser in /etc/ssh/sshd_config
#Change LogLevel to debug and check errors (if any) in /var/log/messages
Subsystem sftp internal-sftp

#Sftp/chroot Settings for bobuser
Match User bobuser
   X11Forwarding no
   AllowTcpForwarding no
   ForceCommand internal-sftp
   ChrootDirectory /home/bobuser

Also add bobuser to the allow users list. This is a good practice to set can use ssh/sftp to login.

AllowUsers alexuser bobuser

Now restart the ssh service. And try connecting.

r00ter127:~ # service sshd restart
Shutting down SSH daemon done
Starting SSH daemon done
r00ter127:~ # sftp bobuser@localhost
Connecting to localhost...
Password:
Read from remote host localhost: Connection reset by peer
Couldn't read packet: Connection reset by peer
Ouch..We need to read the errors in /var/log/messages, we had already set it to debug level. There are some requirements expected by the ssh daemon

Jan 25 11:30:27 r00ter127 sshd[10220]: debug1: PAM: establishing credentials
Jan 25 11:30:27 r00ter127 sshd[10220]: fatal: bad ownership or modes for chroot directory "/home/bobuser"
Set the ownership of the home and parent directories to root. That's a requirement.

test:~ # ls -ld /home/bobuser/
drwxr-xr-x 5 bobuser users 4096 Jun 13 12:21 /home/bobuser/
test:~ # chown root:root /home/bobuser
test:~ # ls -ld /home/bobuser/
drwxr-xr-x 5 root root 4096 Jun 13 12:21 /home/bobuser/
We are set with the permissions now.

r00ter127:~ # sftp bobuser@localhost
Connecting to localhost...
Password:
subsystem request failed on channel 0
Couldn't read packet: Connection reset by peer
If you get the above error, then it means there is some problem invoking the sftp server. And the ssh logs are not very helpful in this regard. Make sure you are using the internal-sftp:

Subsystem sftp internal-sftp
...
   ForceCommand internal-sftp
And then.. you are done.

r00ter127:~ # sftp bobuser@localhost
Connecting to localhost...
Password:
sftp> pwd
Remote working directory: /


Monday, June 9, 2014

PAM module security settings for beginners - Suse 11

Pam modules security settings for beginners(Tested on Suse 11)
Configuring Pluggable Authentication Modules for security could be tricky sometimes. A lot of times people are looking for ways to prevent brute force and password guessing attempts on their ssh. But understanding the working of pam modules, testing them correctly surely takes some time. I am trying to list down here what I have tried and tested. There are 4 modules, cracklib, pwhistory, faildelay and tally. You can explore the man pages for detailed options that are supported, however here is the tricky part: depending on the modules version installed in your Linux, and in some cases depending on the Linux distro as well, the actual behavior may vary and some of the options listed in the man page may not even work. This adds a lot of confusion and frustration on how to get it to work. So define clearly your goals first, and then try out settings as listed in the man pages. Also make a note of where you are adding the rules, and finally a round to testing to ensure, things work as expected.

Few checkpoints, if you face problems when your pam module does not work as intended:

1. Ensure you understand the documented behavior of the module, its purpose, results, limitations etc.
2. Make a note of the PAM rule that you are adding, and the meaning of its parameters
3. Make a note of which file you are adding the rule to (e.g. the rule common-auth, common-password) it may not work if you have added it to the wrong file. :)
4. Well the version you are using, or the distro you are using, may have bugs as well. You need to check and google out any such possibility.
5. Well, if some option is not working in your module, even when it is listed in its man page, probably you are reading the documentation for a newer version
6. Is there any log file that this module writes to, where you can see its behavior?

cracklib is being used for enforcing strong password rules.
faildelay is to make the password prompt delay by a period of time when supplied with a wrong password, which reduces the efficiency of password guessing/brute forcing attacks.
pwhistory is to maintain a history of old passwords, so that users do not reuse their old passwords
pam_tally is to maintain a counter of bad login attempts and to lock the account for a given time, when the counter exceeds the set threshold. The useful feature is to reset the counter when a successful attempt occurs. This again is helpful in reduces the efficiency of password guessing/brute forcing attacks.

(The config files in Suse are in /etc/pam.d/common-auth/account/password):
Using cracklib and pwhistory #Password rules for the creation of strong passwords
- at least one special character (ocredit)
- at least one digit (dcredit)
- at least one lower case letter (lcredit)
- at least one upper case letter (ucredit)
- has a minimum length of 8 characters (minlen)

/etc/pam.d/common-password:

password requisite pam_cracklib.so difok=4 minlen=8 dcredit=-1 ucredit=-1 lcredit=-1 ocredit=-1 maxrepeat=3

#Dont allow previously set passwords, This will remember upto 5 previous passwords.
#The old passwords are stored in /etc/security/opasswd
password required pam_pwhistory.so remember=5 retry=3


Testing
Those password rules do not work for root account. However for non-root accounts, you can try changing them. The errors however could be misleading. For e.g. you may get "password is too simple", even when u have a long password but you forgot to include a special character. So read the manual and keep trying.

faildelay: Brute force and password guessing attack protection
This means when you provide a bad password, the next password prompt would come after 5 seconds (or more). Which is a discouraging thing for automated brute forcing programs. This combined with strong password rules, and locking mechanism with pam_tally provide a good level of protection. /etc/pam.d/common-auth:

#Faildelay to delay the appearance of prompt (mitigation of brute force and password guessing attacks)
#delay is in micro seconds
auth required pam_faildelay.so delay=5000000


Testing for faildelay
Provide a bad password and the next password prompt should appear after 5 seconds.

pam_tally: Temporary account locking and automatic unlocking
You can use pam_tally to lock accounts which pass the defined threshold.(set with deny)

#Locking accounts temporarily when bad passwords are supplied (mitigating brute force and password guessing attacks)
#It uses the tally counter
auth required pam_tally.so deny=5 lock_time=1 unlock_time=60


Testing for pam_tally
By default, the pam_tally module will use /var/log/faillog log file. If you want to see the contents, run faillog command :

test:~ # faillog
Login Failures Maximum Latest On
alexuser 0 0 06/09/14 15:37:20 +0000 test.system.com


Try logging in and providing wrong passwords, with every wrong attempt, the pam_tally would increment Failure count. Once it goes beyond the threshold of 5, it will start locking you for 60 seconds for every bad password you provide. Only after 60 seconds it will accept a password. If you provide the correct password, the faillog is cleared.


test:~ # ssh alexuser@localhost
Password:
Password:
Password:
Account locked due to 6 failed logins

Received disconnect from 127.0.0.1: 2: Too many authentication failures for alexuser
test:~ # ssh alexuser@localhost
Password:
Password:
Account locked due to 8 failed logins

Password:
Account locked due to 9 failed logins

Received disconnect from 127.0.0.1: 2: Too many authentication failures for alexuser


Now you wait for 60 seconds and try logging again, this time provide correct password in first try (or else it will again start the lock period of 60 sec) and the system should log you in. Now you can run faillog and it will be empty because it got reset by your successful login.


References:
http://linux.die.net/man/8/pam_cracklib
http://linux.die.net/man/8/pam_tally
Saturday, June 7, 2014

Java code: Simple RSA encryption and decryption code

A simple program to generate 1024 bit RSA key pair, and perform simple encryption and decryption. No a big deal. Two classes: AsymetricKeyHelper and Main. AsymmetricKeyHelper.java:
/*AsymmetricKeyHelper.java*/
package com.work.crypto;

import java.security.InvalidKeyException;
import java.security.Key;
import java.security.KeyPair;
import java.security.KeyPairGenerator;
import java.security.NoSuchAlgorithmException;
import java.security.PrivateKey;

import javax.crypto.BadPaddingException;
import javax.crypto.Cipher;
import javax.crypto.IllegalBlockSizeException;
import javax.crypto.NoSuchPaddingException;

public class AsymmetricKeyHelper {

 //Generates an RSA public private key pair
 public KeyPair keyPair() {
  KeyPair kp = null;
  try {
   KeyPairGenerator keyPairGenerator = KeyPairGenerator
     .getInstance("RSA");
   keyPairGenerator.initialize(1024);
   kp = keyPairGenerator.generateKeyPair();

  } catch (NoSuchAlgorithmException e) {
   e.printStackTrace();
  }
  return kp;
 }

 //does the encryption
 public byte[] encrypt(byte[] clearTest, Key key) {
  try {
   Cipher cipher = Cipher.getInstance(key.getAlgorithm());
   cipher.init(Cipher.ENCRYPT_MODE, key);
   return cipher.doFinal(clearTest);
  } catch (InvalidKeyException e) {
   e.printStackTrace();
  } catch (NoSuchAlgorithmException e) {
   e.printStackTrace();
  } catch (NoSuchPaddingException e) {
   e.printStackTrace();
  } catch (IllegalBlockSizeException e) {
   e.printStackTrace();
  } catch (BadPaddingException e) {
   e.printStackTrace();
  }
  return null;
 }

 //does the decryption
 public byte[] decrypt(byte[] cipherText, PrivateKey private1) {
  try {
   Cipher cipher;
   System.out.println(private1.getAlgorithm());
   cipher = Cipher.getInstance(private1.getAlgorithm());
   cipher.init(Cipher.DECRYPT_MODE, private1);
   return cipher.doFinal(cipherText);
  } catch (NoSuchAlgorithmException e1) {
   e1.printStackTrace();
  } catch (NoSuchPaddingException e1) {
   e1.printStackTrace();
  } catch (InvalidKeyException e) {
   e.printStackTrace();
  } catch (IllegalBlockSizeException e) {
   e.printStackTrace();
  } catch (BadPaddingException e) {
   e.printStackTrace();
  }

  return null;
 }

}

Main.java:
/*Main.java*/
package com.work.crypto;

import java.security.KeyPair;

public class Main {

 /**
  * @param args
  */
 public static void main(String[] args) {
  asymmetricEncryptionSimple();
 }

 private static void asymmetricEncryptionSimple() {
  AsymmetricKeyHelper keyHelper = new AsymmetricKeyHelper();
  KeyPair keyPair = keyHelper.keyPair();
  System.out.println(keyPair.getPublic().getAlgorithm());
    
  String plainText = "You little Monkey.I am a cryptographer";
  
  byte[] cipherText = keyHelper.encrypt(plainText.getBytes(), keyPair.getPublic());
  //Print the encrypted text, it is in binary. So it will look ugly.
  System.out.println(new String(cipherText));
  
  byte[] clearDecrypt = keyHelper.decrypt(cipherText, keyPair.getPrivate());
  //Create a string out of the byte array
  System.out.println(new String(clearDecrypt));
 }

}


Friday, May 30, 2014

Linux: Compilation of 31 Bash tips and tricks - Part 2 (16-31)

The next part of tips.

These are picked from various sources and usually are helpful to me in my day to day work, so you do not have to read the man pages everytime. I do not remember all the sources, so I will quote the source wherever I remember. If you know the source, please let me know.

I know I have written it in a very clumsy way, without too much explaining of the underlying context and theory or any references. But I hope to make it beginner friendly.

Here we go:

16. [Bash usage tip/security]
Enable a 15 minute timeout for bash. Helps in security best practices.

Let's say you want to auto-logout of your bash shell after 15 minutes of inactivity. This is sometimes an important security requirement as well. You can set this code in the global /etc/profile or for specific user in ~/.bash_profile. This piece essentially creates a readonly environment variable when a user logs in


#Add this in /etc/profile, tested in SUSE
TMOUT=900
readonly TMOUT
export TMOUT

17. [Bash usage tip/security]
Disable command execution in Less.

Well if you don't know this, you can execute commands in less, vi etc
To disable this in less, you need to set an environment variable called LESSSECURE.

export LESSSECURE=1

18. [Bash usage tip/security]
Executing bash commands in vi, less, and more:


in vi -> :!bash
in less -> !bash
in more -> !bash

19. [Bash usage tip/security]
Setting an environment variable as READONLY:


readonly TMOUT
export TMOUT

20. [Bash usage tip/security]
Disable bash builtins using enable. This might help if you are trying something like a restricted shell. I must warn you, its risky.


enable -n <builtin_name>

21. [Bash usage tip]
Useful commands in vi


:set list -special chars
:set nu -line numbers
:.! ls - Add a . before ! during command execution and it will dump the output in the current screen.
:r! <cmd> -same thing, dump the cmd output
:%!xxd - Turn vim into a hexeditor, :%xxd -r to reverse.
q: -command history
:%TOhtml -create an html file body

22. [Shell scripting tip]
Command execution in a subshell. Shell scripting tip.

$(command) is the same as `command`

$(ls) gives you the output of ls
so does `ls`.

23. [Bash usage tip]
env and export -p

Use the env (or export -p) command to see only those variables that have been exported and would be available to a subshell.

24. [Bash usage tip ]
set command:

Use the set command to see the value of all variables and function definitions in the current shell. The list produced by env is a subset of the list produced by set, since not all variables are exported.

25. [Shell scripting tip]
Looping over vars with spaces like "My Folder".


for file in "$@"
    do
    chmod 0750 "$file"
done

26. [Shell scripting tip]
Difference between: "$*" and "$@".


for file in "$*" will expand to:
for file in "file1 file2 file3 My File.txt"

The above will not help if the filename has spaces, like My File.txt, bash would treat it as two files, My and File.txt, and thereafter producing an error like My not found.

for file in "$@"
will expand to:
for file in "file1" "file2" "file3" "My File.txt"

27. [Shell scripting tip]
Number of args can be accessed by ${#}. 


28. [Shell scripting tip]
 Quick sed handy examples, when I read those examples I recall the logic, otherwise the theory confuses me.

Replace password hash in shadow file, if you use -i it will replace in the original file, so be careful:

sed -e '/^user:/s/:[^:]*:/:newpassword:/' /etc/shadow

Change the param value to 3 in sshd_config file

sed -i "s/\(\#MaxAuthTries.*\)/MaxAuthTries 3/g" /etc/ssh/sshd_config

Replace all digits

sed -e 's/[[:digit:]]//g'

Replace all other than digits (Use ^ to negate)

sed -e 's/[^[:digit:]]//g'
Replace all alpha-numeric

sed -e 's/[[:alnum:]]//g'
Replace all other than alphanumeric (special chars)

sed -e 's/[^[:alnum:]]//g'
29. [Performance monitoring tip]
 Listing Apache httpd processes and threads.


List httpd processes:
ps -elf | grep httpd

List httpd worker threads:
ps -elfT | grep httpd


30. [Shell scripting tip]
Using readlink and dirname in shell scripts to get absolute path and directory name.


If you want to read the absolute path for a file use:
readlink -f
$ readlink -f ./file.txt would return
/home/file.txt

For only the directory:
dirname
dirname /etc/passwd returns /etc
31. [ Bash usage tip]
Use CTRL-R to go through the history of commands.


1. Ctrl-R and then type command, it gives the most recent one. Press Ctrl -R more times.
2. Exit anytime using Ctrl-C
3. Edit using arrow keys

Thursday, May 22, 2014

Linux: Compilation of 31 Bash tips and tricks - Part 1 (1-15)

I thought I will start capturing all the personal favorite/useful/bombastic/flamboyant  tips that I use frequently and that I forget regularly. Basically if I have to revise all my bash tricks, I would quickly walk over these tips that I collected over a period of time. BTW, I am adding the tips in parts, and I have added part 2 here:
http://rhosted.blogspot.in/2014/05/linux-compilation-of-bash-tips-and_30.html

These are picked from various sources and usually are helpful to me in my day to day work, so you do not have to read the man pages everytime. I do not remember all the sources, so I will quote the source wherever I remember. If you know the source, please let me know.

I know I have written it in a very clumsy way, without too much explaining of the underlying context and theory or any references. But I hope to make it beginner friendly.

Differences between bash and sh:

http://www.gnu.org/software/bash/manual/html_node/Major-Differences-From-The-Bourne-Shell.html

Bash documentation home:
http://www.gnu.org/software/bash/manual/html_node/index.html#SEC_Contents

Here we go:

1. [Bash usage tip]
Text navigation shortcuts (to make you look like a pro).
These shortcuts are pretty handy and save a lot of your time when you have remembered them. In the beginning I struggled, but later after some practice I find them very easy to use.:

Ctrl - A --- Start
Ctrl - E ---- End
Ctrl - U ---- Cut before the cursor
Ctrl - K ---- Cut after the cursor
Ctrl - Y ---- Paste
Ctrl - T ---- Swap chars before cursor
Ctrl - W ---- Delete word left top the cursor
Ctrl - L ---- Clean the screen
Esc- f/Esc - Right arrow ---- Jump 1 word fwd
Esc-b/Esc - Left arrow ---- Jump 1 word backward

2. [Bash usage tip]
Delete Control M or crlf chars in a text file transferred from windows.
 So basically when you transfer text files to and from a *Nix machine. The transfer tool auto-detects that it is a text file and performs an EOL conversion. However, this does not happen 'automatically' if you have explicitly set the transfer mode to "Binary", or your text files are inside a binary file like zip, or tar.gz.:


When you try to execute a shell script having CRLF chars, you get an error of sort:
# ./shellscript.sh
-bash: ./shellscript.sh: /bin/sh^M: bad interpreter: No such file or directory
You can remove them by the simple use of sed. However, the trick is to type in Ctrl-M character.
sed -i 's/^M//' <filename>

Windows uses CR-LF (carriage and return) for line endings, while *nix uses only return (LF). Type Ctrl - m like this:

Ctrl -V then Ctrl M.

 Print/check for Ctrl M chars in a file using cat:

cat -v <filename>
# cat -v shellscript.sh
#!/bin/sh^M
echo "Hello world!"^M

3.[Bash usage tip]
 Quickly setting date and time:

date -s "8 DEC 2013 18:30:00"
Errors: date: invalid date"
4. [Bash usage tip]
 Size of a directory:

du -sh /root
       17G /root

5. [Bash usage tip]
 View ports tcp (t),udp (u) and  LISTENing (l), along with their corresponding processes (p) and use numbers (n)  (netstat hyphen TOO-LP-N):

netstat -tulpn


6. [Bash usage/Shell scripting tip]
 Cut a field correctly, by use of translate and squeez (tr) to squeez the tab/space formatting. e.g. the following returns the pid.
tr for translate and cut are very important tools for parsing a command line output. The -s option of tr followed by the whitespace character " ", squeezes the whitespace characters (including tabs) and reduces its occurrence to a single whitespace. If we do not use tr, then cut will have some problems identifying the correct field due to multiple occurrence of spaces and tabs.:
ps -ef | grep -i weblogic.name=adminserver | tr -s " " | cut -d" " -f2

7. [Bash usage/Shell scripting tip]
 Redirect output to a file and to standard output at the same time using tee:
 You wanted to save the output of netstat in a file using redirection operator '>' but at the same time wanted to see it on the screen. Use tee and |
netstat -tnlp | tee aaa.txt

8. [Shell scripting tip]
 Set -e file to exit upon error (useful in shell scripts):
 This is quite useful if you have a shell script which has commands that depend on the success of the previous command. For e.g. login to ssh and read a remote file. Using set -e, would make sure that the script exits execution if any of the commands return an error.

#!/bin/bash
#Exit immediately if you see an error.
set -e
....

9. [Shell scripting tip]
 Set -x to see debug output (useful in shell scripts):


#!/bin/bash
#Prints a lot of debugging output
set -x
....

10. [Bash usage tip]
 Use screen to detach, reattach or share the terminal: 
This will help you to run a command that runs overnight, disconnect the remote session and go home. Then come back later next day to re attach to the screen and see how it went.

screen (to simply start a screen, see help for detailed options)
Ctrl -D to detach from the screen
screen -r to re attach
screen -x to attach to an existing screen.
If you are unable to locate screen in your linux, perhaps you need to install it, which isnt very difficult.
11. [Bash usage tip]
 Install open source xming from sourcefourge to setup XWindows display:

You need this when you are running a program that requires a GUI window to be displayed, but if the display variable is not set correctly it fails to start the GUI screen.
For e.g. when you run the weblogic patch utility bsu.sh through putty or a remote terminal. You will get an error of sort:
"No X11 DISPLAY variable was set, but this program performed an operation which requires it."

I should write a separate article on how to setup Xming and display correctly with putty. I know I struggled a lot for the first time. :/
Here is some rough information on how it works: What basically happens is that when you install and start Xming on your windows box, it starts an X11 server which listens for incoming X11 information. Then on your remote linux prompt you set up the DISPLAY information to point to your windows box ip. After that when you start a GUI based program, the X11/GUI information is thrown to the ip set in DISPLAY and the listening server on your windows grabs it and displays the GUI to you.

And BTW, you can also avoid this problem by directly logging into the Desktop environment (if installed) in your linux machine through the console.

http://sourceforge.net/projects/xming/

12. [Bash/Linux usage tip]
 Setup a chrooted ssh sftp account. Yes, you can do it! (Tested on Suse) 

Add a user with a home directory:

useradd -d /home/bobuser -m bobuser

#Sftp/chroot Settings for bobuser in /etc/ssh/sshd_config
#Change LogLevel to debug and check errors (if any) in /var/log/messages
Subsystem sftp internal-sftp

#Sftp/chroot Settings for bobuser
Match User bobuser
   X11Forwarding no
   AllowTcpForwarding no
   ForceCommand internal-sftp
   ChrootDirectory /home/bobuser
Now restart the ssh service. And try connecting.

r00ter127:~ # service sshd restart
Shutting down SSH daemon done
Starting SSH daemon done
r00ter127:~ # sftp bobuser@localhost
Connecting to localhost...
Password:
Read from remote host localhost: Connection reset by peer
Couldn't read packet: Connection reset by peer
Ouch..We need to read the errors in /var/log/messages, we had already set it to debug level. There are some requirements expected by the ssh daemon

Jan 25 11:30:27 r00ter127 sshd[10220]: debug1: PAM: establishing credentials
Jan 25 11:30:27 r00ter127 sshd[10220]: fatal: bad ownership or modes for chroot directory "/home/bobuser"
Set the ownership of the home and parent directories to root. That's a requirement. chown root:root /home/bobuser

r00ter127:~ # sftp bobuser@localhost
Connecting to localhost...
Password:
subsystem request failed on channel 0
Couldn't read packet: Connection reset by peer
If you get the above error, then it means there is some problem invoking the sftp server. And the ssh logs are not very helpful in this regard. Make sure you are using the internal-sftp:

Subsystem sftp internal-sftp
...
   ForceCommand internal-sftp
And then.. you are done.

r00ter127:~ # sftp bobuser@localhost
Connecting to localhost...
Password:
sftp> pwd
Remote working directory: /

13. [Bash usage/Security tip]
 Audacious use of history to read a file, e.g. read the /etc/passwd file using history:


history -r /etc/passwd
history

14.[Bash usage tip]
 Use 'which' and 'type' to differentiate if a command is a binary command or a shell builtin.:


which history
type history


15. [Bash usage/Security tip]
What is the hashing algorithm used in my /etc/shadow:
Well, this could be useful if someone asks you whats the hashing algorithm being used to secure the OS passwords. Higher the number, more secure the algorithm. This tip is incomplete actually. You must also know what algorithms are supported by your Linux distro, and how to change the algo to a stronger one. You will also have to change the passwords so that they are hashed with the new algorithm.

$1 -> md5
$2a -> Blowfish
$5 -> Sha256
$6 -> Sha512

Go to part 2:
http://rhosted.blogspot.in/2014/05/linux-compilation-of-bash-tips-and_30.html